Working with the ISIS IOBC
Overview
This document is intended as an introductory guide for creating, loading, and using Kubos projects and other files within the user space of KubOS Linux on the ISIS iOBC.
Reference Documents
iOBC Documentation
The ISIS-OBC Quickstart Guide should have been packaged with the iOBC and is a useful document for learning what each of the hardware components are, how to connect them, and what drivers need to be installed to support them.
Kubos Documentation
- Installing the Kubos SDK - Basics of setting up the Kubos SDK environment
- Creating your first KubOS Linux project - Steps to create and build a Kubos SDK project
- SDK Command Reference - Overview of the common Kubos SDK commands
- KubOS Linux Overview - Overview of the KubOS Linux components
- KubOS Linux on iOBC - Steps to build and load KubOS Linux for the iOBC
Building a Project
In order to build a project for the ISIS-OBC, you’ll need to create a Kubos SDK project for KubOS Linux, set the correct target, and then build it.
$ kubos init -l newproj
$ kubos target kubos-linux-isis-gcc
$ kubos build
Updating Credentials
Ideally, you should not be using the default root user password. If
you’ve changed it, you’ll need to pass the new password to the Kubos
flash utility through the config.json file, which should be located in
the top-level directory of your project. You’ll need to create the file
if it doesn’t already exist. Update the system.password parameter with
the password to use.
If you’re creating a brand new config.json file, you can just copy and paste the text below (newpass should be your desired password):
{
    "system" : {
        "password" : "newpass"
    }
}
Setting Initialization Configuration
There are several config.json options available which customize how and
when a user application is started:
- system.initAfterFlash - (Default: false) Tells the Kubos SDK whether to start the application as a background daemon after flashing it to the board.
- system.initAtBoot - (Default: true) Tells the Kubos SDK whether to generate and install an initialization script.
- system.runLevel - (Default: 50. Range: 10-99) Sets priority of initialization script.
When the system.initAfterFlash option is turned on, the user
application will be started as a background daemon at the end of the
kubos flash process. This is done using Linux’s
start-stop-daemon command. By default this feature is turned off, so
the value of the option will need to be set to “true” by the user in
order to turn it on.
By default, an initialization script will be generated and installed during the flashing process. This script will follow the naming convention of “S{runLevel}{applicationName}”, where “runLevel” is the initialization priority order of the script. All user application init scripts will be run after all of the Kubos init scripts, but within the user scripts, the scripts with the lowest run level will be executed first. So an application with a run level of 10 will be initialized before an application with a run level of 50.
To turn this feature off, set the system.initAfterBoot option to
“false”.
The run level of an initialization script can be changed after initially
flashing the script to the board. Simply change the system.runLevel
value, rebuild the project, and then reflash it to the board. The old
script will be removed as part of the flash process.
Updating the USB Connection
The iOBC should be shipped with an FTDI cable. This cable should be connected to the programming adapter, which should then be connected to the iOBC, to create the debug UART connection. User file transfer will take place using this connection.
The Kubos flashing utility was configured with the assumption that an FTDI cable would be used. If you have a different USB-to-serial cable type, you’ll need to pass through the USB connection, and then update the minicom configuration to tell the flashing utility which USB to flash over.
You can either pass through the USB via VirtualBox or by updating the vagrant’s Vagrantfile.
Note: While it doesn’t need to be passed through, a SAM-ICE JTAG might also need to be connected to both the iOBC and the host computer in order to create a successful connection.
VirtualBox
Open the VirtualBox Manager
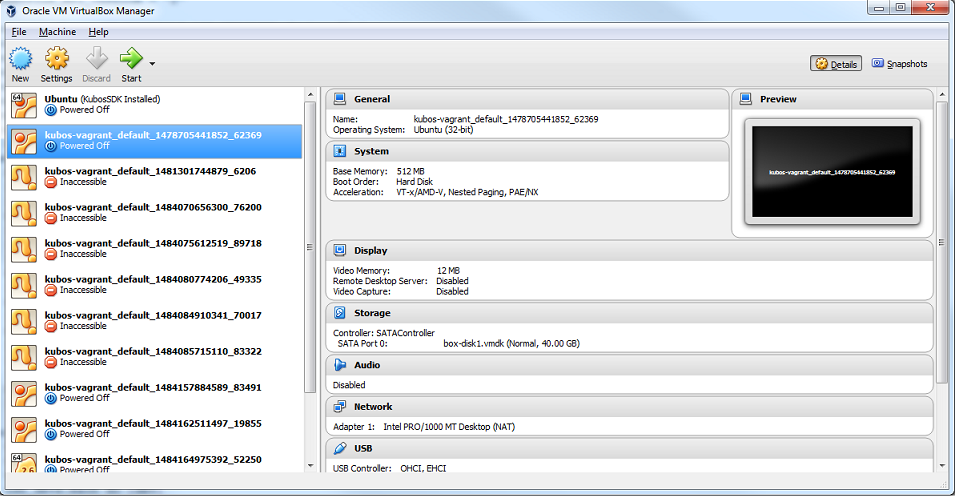
VirtualBox Manager
Right-click on your vagrant VM and select Settings. Click the USB tab.
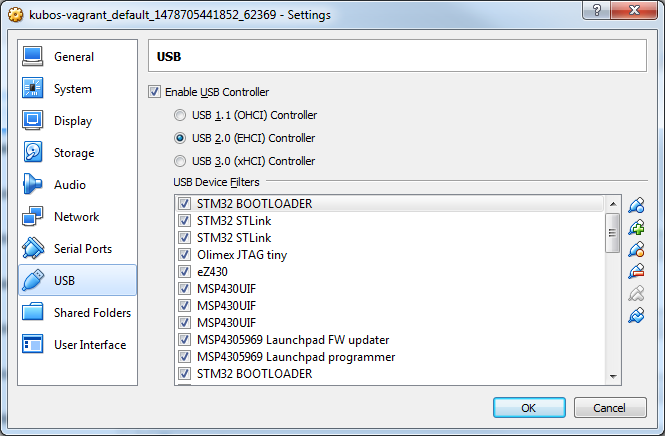
VM USB Options
Click the USB icon with the plus symbol to add a new USB filter. Select the device you want to add and press OK.
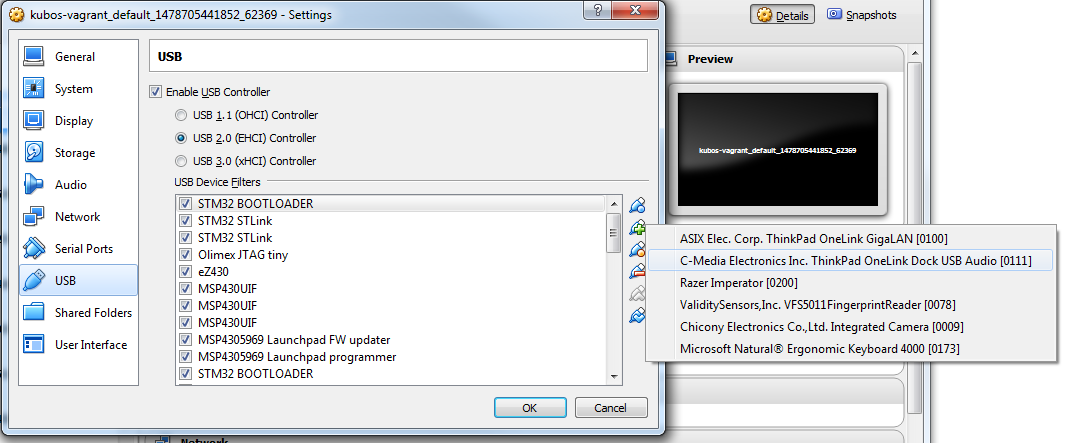
VM USB Devices
Updating the Vagrantfile
Navigate to you vagrant installation directory on your host machine.
Open the Vagrantfile.
You should see a section labeled ‘usb_devs’. You want to add a new entry for your USB device to the bottom of this list.
The format is
['vendor_id', 'product_id', 'Description']
The description can be whatever you want, but the vendor and product IDs will need to be found from the connection on your host computer.
Once you’ve updated Vagrantfile, issue the command vagrant reload to
cause the VM to pick up the new definition. Once you’ve logged in to the
VM, you should be able to see the passed-through connection with the
lsusb command.
On Windows
- Go to the “Start” Menu.
- Select “Devices and Printers”
- Double-click your USB Scale.
- Select the “Hardware” Tab.
- Select “Properties”
- Select the “Details” Tab.
- From the “Device description” Menu select “Hardware Ids”
- Copy the numbers next to “VID_” and “PID_”
On Mac
Issue the system_profiler SPUSBDataType command.
Copy the values in the values in the ‘Product ID’ and ‘Vendor ID’ fields
On Linux
Issue the lsusb command.
Copy the values in the ‘ID’ field. The value in front of the colon should be the vendor ID and the value after should be the product ID.
Updating the minicom configuration
Navigate to /etc/minicom, you should see a file call minirc.kubos. This is the preset minicom serial connection configuration file for KubOS Linux.
Edit the file and update the ‘pu baudrate’ field and change ‘/dev/FTDI’ to the ‘/dev/*’ device name your USB connection has.
- You can find this device by issuing
ls /dev/. The connection will likely be one of the /dev/ttyUSB* devices.
You can test the changes by issuing the minicom kubos command. If
you successfully connect to your board, then the changes have been
successful.
Flashing the Application
The USB-to-serial cable and SAM-ICE JTAG should be connected to the iOBC and the board should be fully powered.
Assuming you’ve successfully built a Kubos SDK project for the ISIS-OBC
board, when you issue the kubos flash the output should look like
this:
info: found newproj at source/newproj
Compatible FTDI device found
Sending file to board...
Bytes Sent: 693248/1769379 BPS:8343 ETA 02:08
Transfer Successful
Execution time: 21 seconds
The application binary will be loaded into the /home/system/usr/bin directory on the target board.
If the ‘system.initAtBoot’ option has been turned on, then a standard initialization script will be generated and flashed into the /home/system/etc/init.d directory automatically during the application flashing process.
If the ‘system.initAfterFlash’ option has been turned on, then the application will be started as a background service as the last step in the application flashing process.
Flashing Non-Application Files
If you would like to flash a file other than the application binary onto your board, you can add an additional parameter to the usual flash commad:
$ kubos flash {absolute-path-of-file}
If the name of the file matches the name of the application, as specified in the module.json file, then the file is assumed to be the application binary and will be loaded into /home/system/usr/bin on the target board.
If the name of the file ends in *.itb, the file is a KubOS Linux upgrade package and will be loaded into the upgrade partition of the target board. An internal variable will be set so that the upgrade package will be installed during the next reboot of the target board.
All other files are assumed to be non-application files (ex. custom shell scripts) and will be loaded into /home/system/usr/local/bin. Once they have been flashed, these files can then be manually moved to another location.
Note: The file does not need to reside within a Kubos SDK project,
but the kubos flash command must still be run from the project,
since that is where the target configuration information is stored.
For example:
$ kubos flash /home/vagrant/not-my-project/test-util.sh
Flash Troubleshooting
Flashing a file to the board can fail for various reasons. Sometimes simply reattempting the command can correct the problem.
If retrying doesn’t work, here is a list of some of the error you might
see after running the kubos flash command and the recovery actions
you can take:
“No compatible FTDI device found”
- Check that the iOBC is turned on and connected to your computer
- Check that no other vagrant images are running. Only one VM can have
control of the USB, so it may be that another instance currently has
control of the device. You can shutdown a vagrant image with the
command
vagrant halt - Verify that the USB is showing up within the vagrant environment with
the
lsusbcommand. You should see an FTDI device - Verify that the USB has been mapped to a linux device. Issue the
command
ls /dev. You should see a /dev/ttyUSB* device. If you don’t, try rebooting your vagrant image (vagrant halt,vagrant up)
“Transfer Failed: Connection Failed”
- The SDK was unable to connect to the iOBC
- Verify that the USB has been mapped to a linux device. Issue the
command
ls /dev. You should see a /dev/ttyUSB* device. If you don’t, try rebooting your vagrant image (vagrant halt,vagrant up) - If this error occurs after the transfer process has started, then the SDK likely lost connection to the iOBC. Verify that the board is still correctly connected and powered and try the flash command again.
“Transfer Failed: Invalid Password”
- The SDK was unable to log into the iOBC. Verify that the password is
correctly defined in your config.json file by issuing the
kubos configcommand.
System appears to have hung
- If for some reason file transfer fails, it can take a couple minutes for the connection to time out and return control.
- If you’ve waited a couple minutes and the system still appears hung, please let us know so that we can open a bug report.
Debug Console
If the iOBC is correctly connected to your host computer, you should see a /dev/ttyUSB* device in your vagrant VM. The VM is set up to automatically forward any FTDI cables that connect to a /dev/FTDI device for ease-of-use.
The vagrant image comes pre-packaged with a minicom serial connection configuration file for the iOBC debug uart port. You can connect with this configuration file using the command
$ minicom kubos
Alternatively, you can manually create a serial connection with minicom (or other terminal application) using the following connection configuration:
| Setting | Value |
|---|---|
| Baudrate | 115200 |
| Bits | 8 |
| Parity | N |
| Stop Bits | 1 |
Once connected, you can log in using either a user that you’ve created, or root, which has a default password of ‘Kubos123’.
Fully logged in, the console should look like this:
Welcome to KubOS Linux

Kubos login: root
Password:
Jan  1 00:00:16 login[212]: root login on 'ttyS0'
~ #
Manual File Transfer
If for some reason you want to manually transfer a specific file onto the iOBC, for example a custom script, you’ll need to do the following:
Connect to the board through minicom (the file transfer protocol is not guaranteed to work with any other terminal program)
$ minicom kubos
Login to the board
Welcome to minicom 2.7

OPTIONS: I18n
Compiled on Feb  7 2016, 13:37:27.
Port /dev/FTDI, 21:26:43

Press CTRL-A Z for help on special keys


Welcome to KubOS Linux
(none) login: root
Password:
Jan  1 00:00:11 login[210]: root login on 'ttyS0'
~ #
Navigate to the location you’d like the received file to go.
~ # mkdir righthere
~ # cd righthere
~/righthere #
Issue the zModem command to prep the board to receive a file
$ rz -bZ
Press Ctrl+a, then press s to open the minicom file transfer dialog.
+-[Upload]--+
| zmodem    |
| ymodem    |
| xmodem    |
| kermit    |
| ascii     |
+-----------+
Select zmodem
+-------------------[Select one or more files for upload]-------------------+
|Directory: /home/vagrant                                                   |
| [..]                                                                      |
| [linux]                                                                   |
| [newprj]                                                                  |
| minicom.log                                                               |
|                                                                           |
|              ( Escape to exit, Space to tag )                             |
+---------------------------------------------------------------------------+

               [Goto]  [Prev]  [Show]   [Tag]  [Untag] [Okay]
Select the file to send:
Press g to open the Goto dialog and navigate to the desired folder
(full pathname required).
Press enter to open the file selector dialog and specify the file you want within the current folder.
+-------------------[Select one or more files for upload]-------------------+
|Directory: /home/vagrant/linux/build/kubos-linux-isis-gcc/source           |
| [..]                                                                      |
| [CMakeFiles]                                                              |
| CMakeLists.txt                                                            |
| CTestTestfile.cmake                                                       |
| cmake_install.cmake                                                       |
| linux                                                                     |
| linux.map                                                                 |
|                +-----------------------------------------+                |
|                |No file selected - enter filename:       |                |
|                |> linux                                  |                |
|                +-----------------------------------------+                |
|                                                                           |
|              ( Escape to exit, Space to tag )                             |
+---------------------------------------------------------------------------+

               [Goto]  [Prev]  [Show]   [Tag]  [Untag] [Okay]
You should see a progress dialog as your file is transferred to the board.
+-----------[zmodem upload - Press CTRL-C to quit]------------+
|^XB00000000000000rz waiting to receive.Sending: linux        |
|Bytes Sent:  41984/  99084   BPS:8905     ETA 00:06          |
|                                                             |
|                                                             |
|                                                             |
|                                                             |
|                                                             |
+-------------------------------------------------------------+
Once file transfer is complete, you should be able to press enter and use your new file
+-----------[zmodem upload - Press CTRL-C to quit]------------+
|^XB00000000000000rz waiting to receive.Sending: linux        |
|Bytes Sent:  99084   BPS:7982                                |
|                                                             |
|Transfer complete                                            |
|                                                             |
| READY: press any key to continue...                         |
|                                                             |
+-------------------------------------------------------------+
Press Ctrl+a, then q to bring up the dialog to exit minicom. Hit enter to quit without reset.
Example Program
Let’s walk through the steps to create the example KubOS Linux project.
Initialize the project
$ kubos init --linux newproj
Move into the project folder
$ cd newproj
Set the project target
$ kubos target kubos-linux-isis-gcc
Build the project
$ kubos build
Flash the project
$ kubos flash
Log into the board
$ minicom kubos
Login: root/Kubos123
Run the example application
$ newproj
Output should look like this:
Initializing CSP
Starting example tasks
Ping result 80 [ms]
Packet received on MY_PORT: Hello World
Ping result 90 [ms]
Packet received on MY_PORT: Hello World
Ping result -1 [ms]
Packet received on MY_PORT: Hello World
Ping result 60 [ms]
Packet received on MY_PORT: Hello World
Ping result 50 [ms]
Packet received on MY_PORT: Hello World
Press Ctrl+C to exit execution.
Press Ctrl+A, then Q to exit minicom.
Using Peripherals
The iOBC has several different ports available for interacting with peripheral devices. Currently, users should interact with these devices using the standard Linux functions. A Kubos HAL will be added in the future for the iOBC.
I2C
KubOS Linux is currently configured to support the I2C standard-mode speed of 100kHz.
The I2C bus is available to the userspace as the ‘/dev/i2c-0’ device. Users will need to add their peripheral device to the system and then open the bus in order to communicate. Once communication is complete, the bus should be closed and the device definition should be removed.
Since the peripheral devices will be different for each client, they will need to be dynamically added in the userspace (method 4).
The bus is then opened using the standard Linux open function and
used for communication with the standard write and read
functions. These functions are described in the Linux I2C dev-interface
doc. The
buffer used in the write and read functions will most likely
follow the common I2C structure of “{register, value}”
The user program should look something like this:
/* Add device to system */
system("echo i2cdevice 0x20 > /sys/bus/i2c/devices/i2c-0/new_device);

/* Open I2C bus */
file = open("/dev/i2c-0");

/* Configure I2C bus to point to desired slave */
ioctl(file, I2C_SLAVE, 0x20);

/* Start of communication logic */
buffer = {0x10, 0x34};
write(file, buffer, sizeof(buffer));

read(file, buffer, lengthToRead);
/* End of communication logic */

/* Close I2C bus */
close(file);

/* Remove device */
system("echo 0x20 > /sys/bus/i2c/devices/i2c-0/delete_device);
GPIO
The iOBC has 27 GPIO pins available. These pins can be dynamically controlled via the Linux GPIO Sysfs Interface for Userspace as long as they have not already been assigned to another peripheral.
To interact with a pin, the user will first need to generate the pin’s device name:
$ echo {pin} > /sys/class/gpio/export
The {pin} value can be found in the below chart:
| iOBC GPIO # | Linux GPIO Value |
|---|---|
| 0 | 42 |
| 1 | 43 |
| 2 | 44 |
| 3 | 45 |
| 4 | 52 |
| 5 | 53 |
| 6 | 54 |
| 7 | 55 |
| 8 | 56 |
| 9 | 57 |
| 10 | 58 |
| 11 | 59 |
| 12 | 60 |
| 13 | 61 |
| 14 | 62 |
| 15 | 63 |
| 16 | 12 |
| 17 | 13 |
| 18 | 14 |
| 19 | 15 |
| 20 | 16 |
| 21 | 17 |
| 22 | 18 |
| 23 | 19 |
| 24 | 20 |
| 25 | 21 |
| 26 | 22 |
For example, to interact with the iOBC’s GPIO5 pin, which has a Linux GPIO value of 53, the user will use:
$ echo 53 > /sys/class/gpio/export
Once this command has been issued, the pin will be defined to the system as ‘/sys/class/gpio/gpio{pin}’. The user can then set and check the pins direction and value.
Set GPIO5 as output:
$ echo out > /sys/class/gpio/gpio53/direction

Set GPIO23's value to 1:
$ echo 1 > /sys/class/gpio/gpio19/value

Get GPIO10's value:
$ cat /sys/class/gpio/gpio58/value
SPI
The external SPI bus is not currently available to the userspace. It will be added in a future release.
User Accounts
In general, it is preferred to use a non-root user account to interact
with a Linux system. A default user account ‘kubos’ is included with
KubOS Linux. Other user accounts can be created using the standard Linux
commands (adduser, useradd, etc).
All user accounts should have a home directory in the format ‘/home/{username}’.
The passwd command can be used to change the password of existing user
accounts.
If you change the root user’s password, be sure to also update the password in any Kubos SDK project configurations.
KubOS Linux File System
There are a few key directories residing within the KubOS Linux user space.
/home
All user-created files should reside under the /home directory. This directory maps to a separate partition from the root file system. As a result, all files here will remain unchanged if the system goes through a kernel upgrade or downgrade.
The home directories of all user accounts, except root, should live under this directory.
Any files not residing under the /home directory will be destroyed during an upgrade/downgrade
/home/usr/bin
All user-created applications will be loaded into this folder during the
kubos flash process. The directory is included in the system’s PATH,
so applications can then be called directly from anywhere, without
needing to know the full file path.
/home/usr/local/bin
All user-created non-application files will be loaded into this folder
during the kubos flash process. There is currently not a way to set
a destination folder for the kubos flash command, so if a different
endpoint directory is desired, the files will need to be manually moved.
/home/etc/init.d
All user-application initialization scripts live under this directory. The naming format is ‘S{run-level}{application}’.